Friday, August 29, 2014
Great Slide Deck: Ten Reasons Developers Hate Your API
When designing an API, it's important to follow several well-intentioned and reasonable principles. Check out this slide deck for a great overview of the different principles you should adhere to when developing an API! It covers everything from documentation to how you expose different services to how you communicate updates and version changes.
Tuesday, August 26, 2014
Android + Drive: Getting Started with Google Drive on Android
Google makes it so easy to integrate the Drive API into Android.
Firstly, Google Drive has been part of Android for some time now. That means you don't have to download any additional SDK since all you need is the Google Play Services library that comes bundled with every Eclipse/ADT installation.
1) Set up the Google Play Services project as a library in your Eclipse workspace (for a breakdown of the steps involved, see this guide), and add it to the Google Drive Quickstart Android application (download it here)
2) Create a new project in the Google Developers Console.

3) We are interested in giving our app access to our users' folders and files on Google Drive, so we need to enable OAuth.
Once your project from Step 2 has been created, go to Credentials and click "Create new client ID."

keytool -exportcert -alias androiddebugkey -keystore path-to-debug-or-production-keystore -list -v
Copy the SHA1 key and paste it into the Google Developers Console.


You should see the SHA1 after you complete this process. If you don't see it or missed it, don't worry, just go through the same process again (using existing keystore/key instead of creating a new one) and you'll see it on the final screen. Copy the SHA1 and paste it into the Google Developers Console. Also enter your package name (e.g. com.example.drivedemo) into the appropriate field.
You should see the Client ID on the page after you submit the required information.
To read more on what you just did, click here.
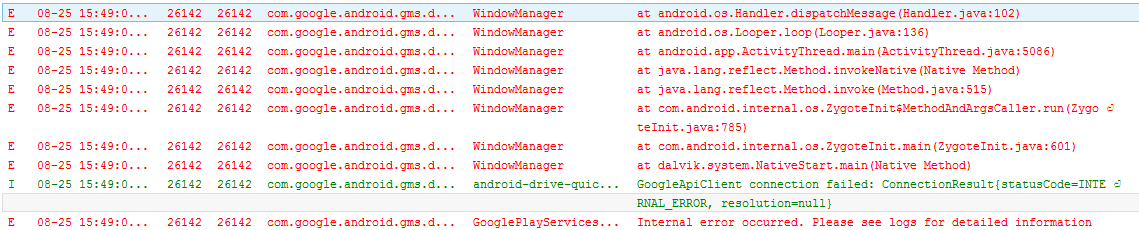
5) Make sure you go into Google Developers Console and turn on access to the Drive API under your project (select your project, click on "APIs and auth" in the left naviation pane, and then select "APIs"). Note that there are two things: Drive API and Drive SDK. Earlier, I kept getting an error that looked like this:
Firstly, Google Drive has been part of Android for some time now. That means you don't have to download any additional SDK since all you need is the Google Play Services library that comes bundled with every Eclipse/ADT installation.
1) Set up the Google Play Services project as a library in your Eclipse workspace (for a breakdown of the steps involved, see this guide), and add it to the Google Drive Quickstart Android application (download it here)
2) Create a new project in the Google Developers Console.
3) We are interested in giving our app access to our users' folders and files on Google Drive, so we need to enable OAuth.
Once your project from Step 2 has been created, go to Credentials and click "Create new client ID."
4) Select "Installed Application", select "Android" and then enter the package name as well as the signing certificate fingerprint.
For Debugging:
Open your console, and type in the following command:
Copy the SHA1 key and paste it into the Google Developers Console.
For Production:
Before you can enter these though, you'll need to go back to Eclipse/ADT and sign your app. Select the project, then click on File > Export. Select Export Android Application, and then select the project you want to sign. Create a new keystore and then create a new key as shown in the images below.
Export the package as an .apk file:
You should see the Client ID on the page after you submit the required information.
To read more on what you just did, click here.
5) Make sure you go into Google Developers Console and turn on access to the Drive API under your project (select your project, click on "APIs and auth" in the left naviation pane, and then select "APIs"). Note that there are two things: Drive API and Drive SDK. Earlier, I kept getting an error that looked like this:
Ultimately I realized that this was because I'd turned on Drive SDK, but not Drive API. So to save yourself some hassle, just turn both on.
6) Also put in your email address and product name in "Consent Screen" under "APIs and Auth". Apparently if you don't do that it won't work - there are lots of posts on forums about this.
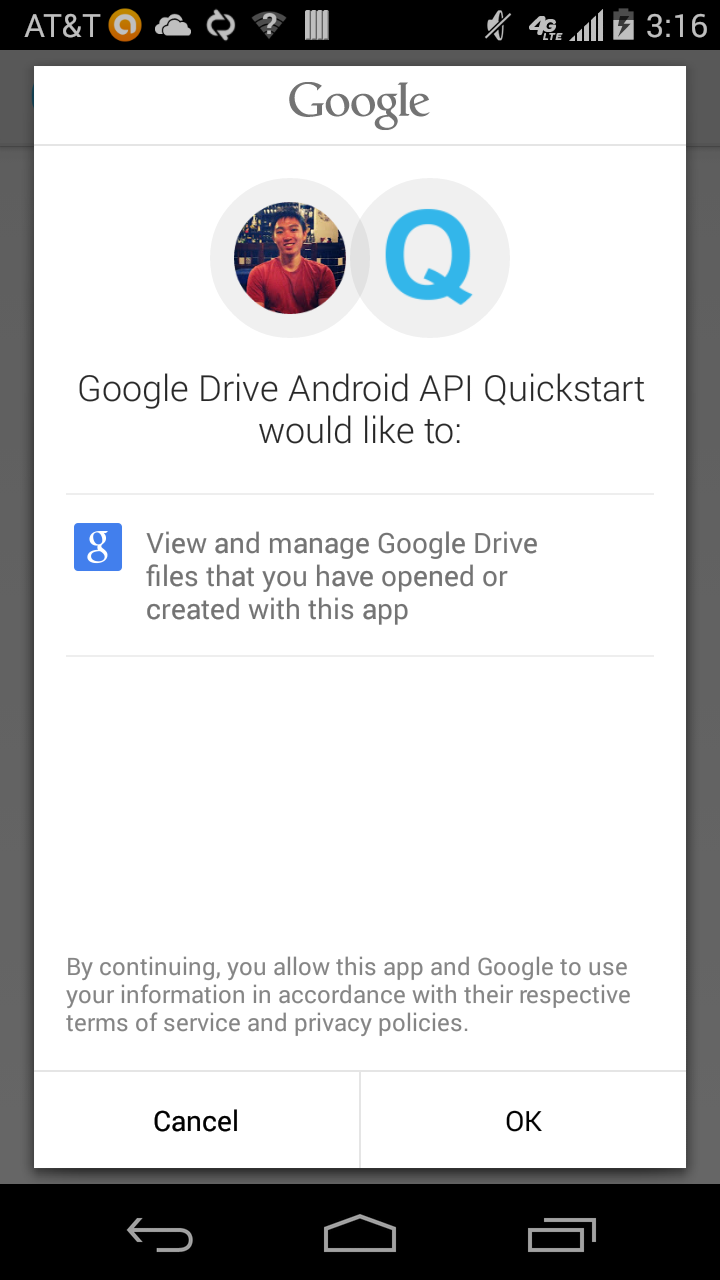
7) Run the application (right click on the project > run as > android application) and it should work! It will prompt you to select a Google account on your phone, and then ask you to grant consent to the app. Finally you'll be able to take photos using your phone and upload them to Google Drive.
And that's it! You have gotten Google Drive working on Android.
Thursday, August 21, 2014
Installing Eclipse/ADT for Android Development
Android is big. It has already been big for several years, and it looks like its on a path to complete domination, so if you don't already know how to program on Android, you should start learning pretty soon.
In this post I'll talk about how to set up your development environment for Android.
In this post I'll talk about how to set up your development environment for Android.
What's the difference between Java and Android?
According to Wikipedia,
There is no Java Virtual Machine in the Android platform. Java bytecode is not executed. Instead Java classes are compiled into a proprietary bytecode format and run on Dalvik, a specialized virtual machine (VM) designed specifically for Android.
There is a lot of confusion between what's Java and what's Android. For now, think of Java as a programming language, and think of Android as an Operating System. (Of course, the distinctions are not as clear-cut as that) To run apps on Android, you write them in Java.
If you want to get deeper into the nitty-gritty of the differences, check out this article by CNET which does a pretty good job explaining the differences and how they were the subject of a recent lawsuit by Oracle against Google.
Installation and Set-up for Windows
1. Download Eclipse ADT with Android SDK for Windows here. You'll realize that there are two full-featured IDEs you can use for Android development, Eclipse ADT and Android Studio. Android Studio is still in beta so I'd recommend the former. I haven't yet tried Android Studio, but after reading this post on the differences between Android Studio and Eclipse I just might.
Question: What's the difference between Eclipse and Eclipse ADT?
Eclipse is an open-source IDE, mostly provided in Java. Eclipse ADT is developed by Google and is a plug-in for Eclipse specifically designed for Android development.
2. Unzip the downloaded file and launch Eclipse from adt-bundle-<os-platform>/eclipse/
Having problems unzipping the file using the default unzipping tool in Windows? That's because the tool doesn't work when the file path is too long. Move the zipped file to the root of C:/ before trying again, and the problem should be fixed.
3. Just click OK when the prompt on selecting your workspace appears. Awesome! You're in Eclipse and can start writing Android apps right away!
Node.js & Express
I was first exposed to Node.js during the HackNY hackathon, one of the largest student hackathons on the East Coast. My partner and I built an awesome news/media consumption web app that basically calls into about 10 APIs whenever you enter a search query, then returns a page aggregating results from all those sources. It was lots of fun and a surefire way to win a prize at the hackathon, and we won a prize for using the most number of APIs.
I needed a refresher on Node.js because I haven't touched it since, so I went and re-educated myself on the good stuff recently by reading some getting started guides and following along to create simple, barebones apps. Here are some links I found useful:
The dead-simple step-by-step guide for front-end developers to getting up and running with Node.js, Express, Jade and MongoDB - this one's written by someone who develops on Windows. So if you're always left scratching your head when someone writes about some tool that's only available on Mac, this one's for you. This combination of Node.js, Express, Jade and MongoDB is one of those modern stacks that the industry is increasingly using nowadays.
Creating a simple RESTful web app with Node.js, Express, and MongoDB - by the same author above.
The Node Beginner Book - I don't think this one's worth its $9.99 price. But for free, you get pretty much the first 1/3 of the book on that page I linked to and it does a good job covering the basics.
Subscribe to:
Posts (Atom)